What you need:

good, sharp scissors
scotch tape
pony tail holders
yarn
something to wrap (about 1/2 the length of how long you want your falls to be)
I generally use two or three different yarns. I also generally make one of those a "base color" that is similar to my own hair color, so a more well blended look. But that's just me, obviously you can choose whatever colors you'd like!
To start off, I like to unravel all the yarn before I do anything else. That way, if there are any knots/etc I can deal with them ahead of time.
Grab the thing you are using to wrap the yarn around. Depending on the length I've wanted the falls to be, I've used a book, my laptop, and the back of my dining room chair. I liked the length I got from the chair the best, so that's what I used this time as well.
Grab one end of each yarn, and tape the in the center of your wrapping base, like so:

Now, wrap the yarn around your base until you reach the end of one of them. Cut the others to the same length as the one that ran out first. Now, using a little scrap of yarn or string, tie the yarn together in the center, opposite the side you taped down.

Carefully slide your yarn off of your base. Holding it where the bow is, cut entirely through the opposite side.

You should now have one long, straight bundle of yarn. Don't worry about the length being even now, that will come later. Untie your yarn and lay it out flat. Grab one of the pony tail holders.
Now grab 2-3 strands of yarn. Fold the yarn in half. Put the rounded end through the pony holder, then pull the loose ends through the loop. Pull it as tight onto the pony holder as you can. Repeat this process until you get the fall as full as you want it, but leave a space on the pony holder with nothing on it.


* Note- the more strands you try to tie into one knot, the thicker the actual knot will be. This will mean that there will be less room to tie on others, and will result in a thinner/less full fall. Doing 2-3 strands at a time is tedious, but the end result is better*
So, that is how you make them. Now let's move on to wearing them!
To put the falls on, pull your hair into a high, tight bun or buns, depending on if you are doing a pony or pigtails. I prefer the look of pigtails.

Grab one of your falls. Decide which side should be the "front" or visible part of it. Place this part over your bun, against your head, so that the "back" is facing up. Wrap the empty part of the pony holder around your bun. Stick in a few clips or bobby pins. Flip your head up. The finished look:

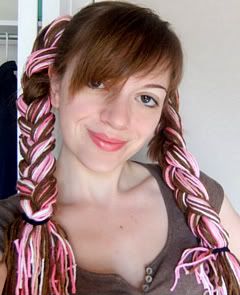
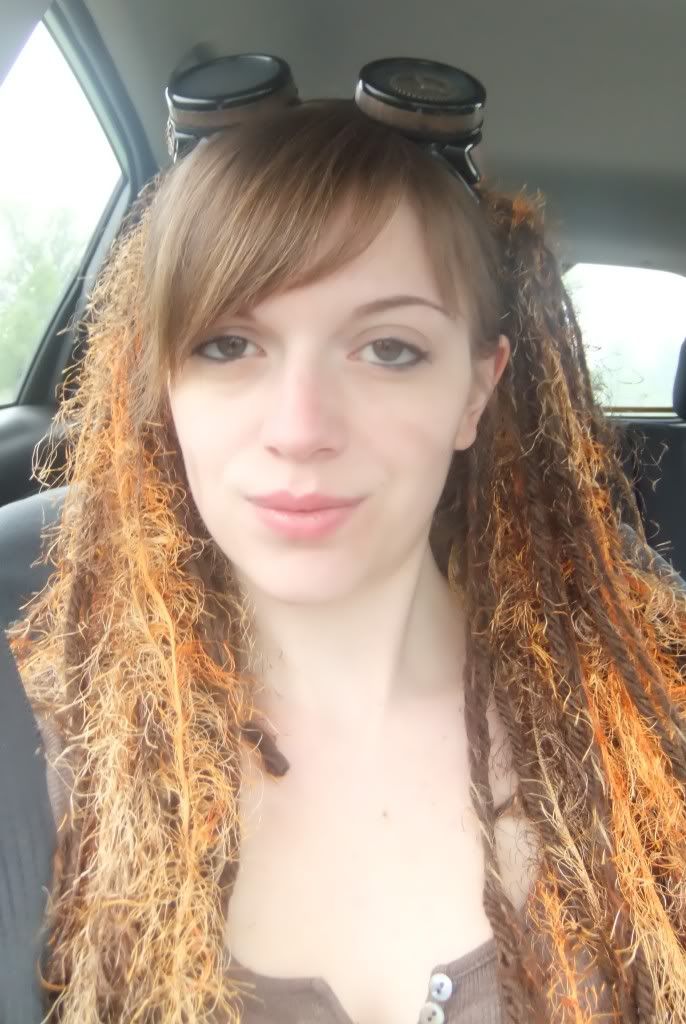
I made these ones without a base color, so they don't blend as well with my hair. These particular falls are for a rave though, so I wanted them really bright, and i'm hoping the white will glow in the blacklights. Here are some others I have made using my base color:
I recently discovered that the white/rainbow falls I made in this tutorial also glow under black light. Very cool!
ReplyDelete